
How to Make Trader Joe’s Corned Beef for St. Patrick’s Day Using an Instant Pot

How to Make Trader Joe’s Corned Beef for St. Patrick’s Day Using an Instant Pot

Introduction

Hello! Welcome back to Maegami’s Home Cooking Series.
Today, I’ll show you how to cook Trader Joe’s Corned Beef using an Instant Pot, perfect for celebrating St. Patrick’s Day.

This flavorful dish is simple, hearty, and comforting—ideal for a festive meal at home.

💲Price Range: $19–$32

Trader Joe’s Corned Beef is a limited seasonal item, available only around March 17 for St. Patrick’s Day. It usually appears in stores in late February, but only for a short time—so grab it while you can!

What Is St. Patrick’s Day Corned Beef?

Despite the name, “corned” doesn’t refer to corn (the vegetable).
The word comes from “corns of salt”, meaning large grains of rock salt used to preserve and season beef brisket.

In the U.S., this dish is especially popular in March—big cuts of brisket are cured in salt and spices, often with mustard seeds and herbs, creating a unique savory flavor unlike regular beef.

Trader Joe’s Corned Beef Recipe (Instant Pot Version)

Here’s how I made it, inspired by Trader Joe’s own style.
I didn’t have Guinness beer this time instead I used sake—it still turned out great!

Ingredients

  • 1 large onion
  • ½ pack Trader Joe’s Corned Beef
  • 1 bottle Guinness beer (or 200 ml sake)
  • 2 cups water (add more for a lighter flavor)
  • 3 potatoes
  • 3 carrots
  • Plenty of cabbage (the more, the sweeter it gets)

Step-by-Step Cooking Instructions

You can use a regular pressure cooker if you don’t have an Instant Pot.

Step 1: Prepare the Ingredients
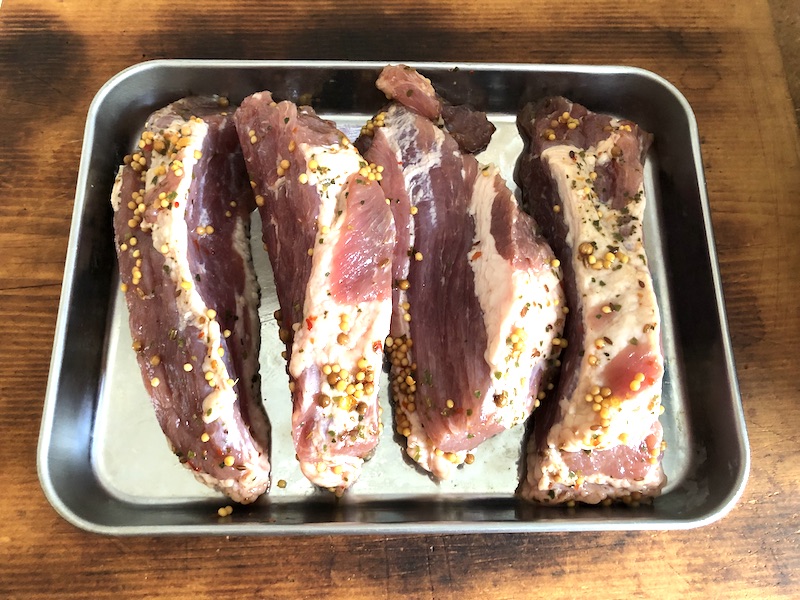
コーンビーフを切ったものの画像

Chop the onion roughly and cut the corned beef into large chunks (I used half the brisket and divided it into four portions—enough for two meals).

Step 2: Layer and Add Liquids
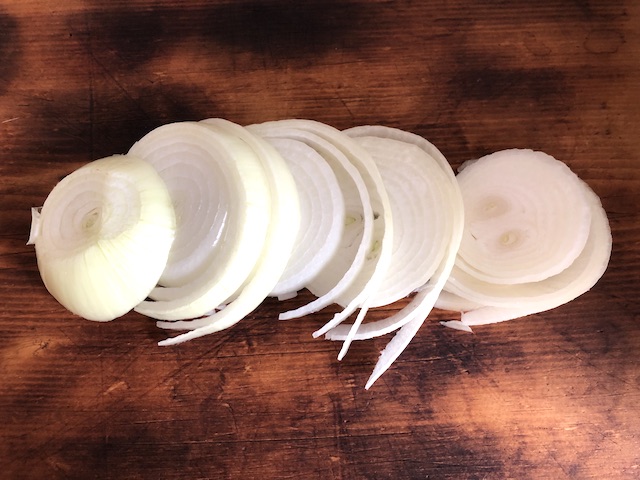
コーンビーフ用の玉ねぎの画像

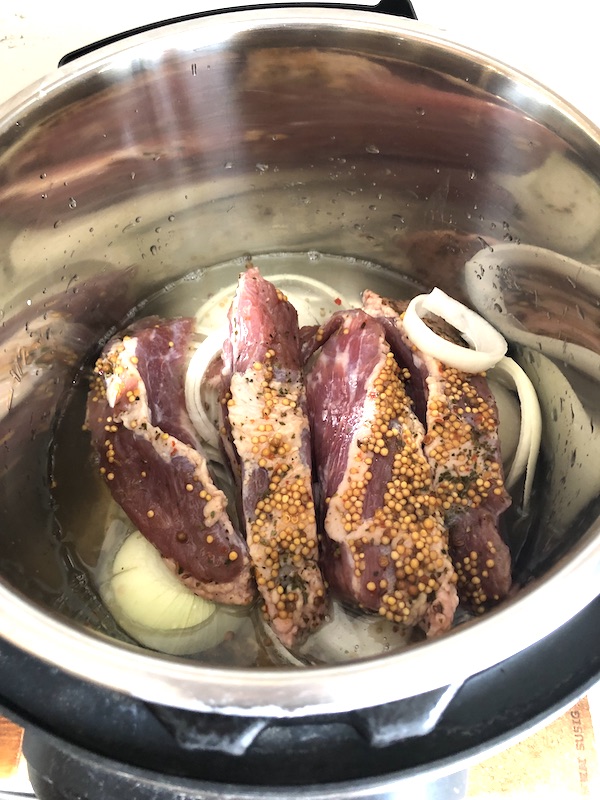
Place the chopped onion at the bottom of the Instant Pot.
Put the corned beef fat-side down on top.
Pour in the beer (or sake) and water.
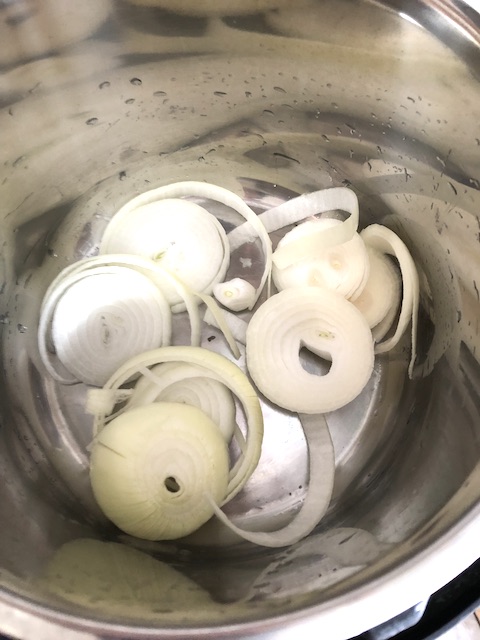
インスタントポット の中の切った玉ねぎの画像

Step 3: Pressure Cook the Beef

インスタントポット とビーフの画像

Set the Instant Pot to High Pressure for 60 minutes (1.5 kg takes around 70 minutes).
Once cooking is done, let the pressure naturally release for 20 minutes.
⏱ Total time: about 80 minutes.

Step 4: Cook the Vegetables

After the beef is done, remove it and the onions.
Keep the broth inside the pot—it’s full of flavor.
Add chopped potatoes, carrots, and cabbage.
Cook again on High Pressure for 5 minutes.

Step 5: Serve and Enjoy

Your corned beef should be tender, juicy, and full of flavor.
The cabbage, especially, turns out deliciously sweet when cooked in the Instant Pot.

Is Corned Beef Unhealthy?

Corned beef is processed meat, so it’s often high in salt and preservatives. However, it’s also rich in nutrients—especially iron, zinc, and B vitamins.

Enjoying it occasionally is perfectly fine—it’s satisfying and full of flavor.
Plus, one brisket can serve about two meals for two people!

Summary

Today, we made Trader Joe’s Corned Beef for St. Patrick’s Day using an Instant Pot.
Next time, I’ll try it with Guinness beer for a richer flavor—but even with sake, it was surprisingly tasty!

If you love simple, hearty home cooking, give this recipe a try—you’ll be happy!

  • Instant Pot Duo 6-Quart 7-in-1 Electric Pressure Cooker
    👉 Check price on Amazon (affiliate link)
  • Instant Pot Stainless Steel Trivet (if yours didn’t come with one)
    👉 See it on Amazon (affiliate link)
  • Organic Beetroot Powder (for smoothies or natural coloring)
    👉 View on Amazon (affiliate link)

💡 As an Amazon Associate, I earn from qualifying purchases. Your support helps keep this blog running — thank you!


Hakata Tonton | Authentic Motsunabe and Okonomiyaki in New York

Hakata Tonton: A Must-Visit Japanese Restaurant in New York

Hello! This is Maegami from Megami no Mae Kami blog. Today, I’m excited to share a restaurant review with you! It’s been about 10 years since I last visited Hakata Tonton in New York, and I was thrilled to experience it again.

Previously located in the West Village, Hakata Tonton has now moved to 35th Street in Midtown Manhattan, an area that’s home to many amazing restaurants. Among them, Hakata Tonton stands out with its delicious Japanese offerings. If you’re a fan of traditional Japanese hotpots and comfort food, this place is definitely worth a visit.

Hakata Tonton Website

Where is Hakata Tonton Located?

Hakata Tonton is conveniently located near the 34th Street subway station, which is serviced by the orange lines (D, M, F) and the yellow lines (N, Q, R). If you exit at 35th Street, you can avoid the busy crowds and enjoy a pleasant walk to the restaurant.

Hakata Tonton Menu: Traditional Japanese Dishes with a Twist

The highlight of Hakata Tonton’s menu is, of course, its Motsunabe (beef offal hotpot), which is rich and flavorful. However, the side dishes here are also a huge draw. One of my personal favorites is the Okonomiyaki (Japanese savory pancake), which is loaded with seafood and packed with flavor. The quality is so high that I’m not sure you could replicate this at home. It’s definitely a dish I’d recommend ordering.

Here are some highlights from their menu:

博多とんとん もつ鍋の画像
博多とんとん もつ鍋の画像2
  • Motsunabe – A rich, delicious hotpot with perfectly tender beef offal and a unique addition of burdock root. The broth is flavorful yet not too greasy, making it a standout dish in New York’s hotpot scene.
  • Okonomiyaki – This savory pancake filled with seafood is perfect for those who love a hearty meal with a Japanese twist.
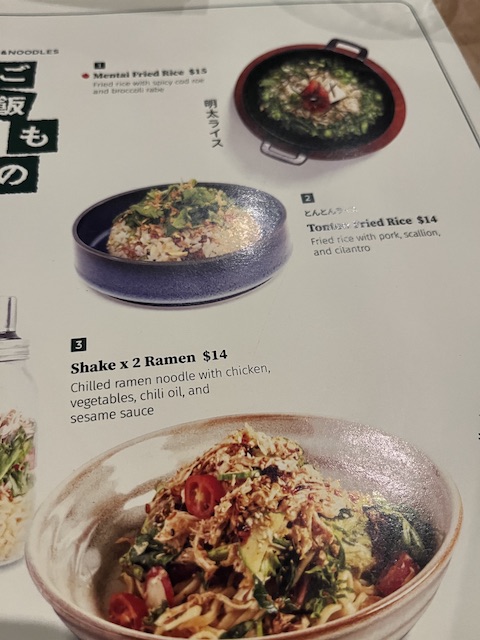
  • Ramen – Though I wasn’t as blown away by the ramen, it’s still worth mentioning, especially for those craving a quick bowl of Japanese noodles.

A Sweet Ending: Desserts at Hakata Tonton

After indulging in the savory dishes, you might think you’re too full for dessert – but the sweets here are too tempting to resist! The dessert menu includes:

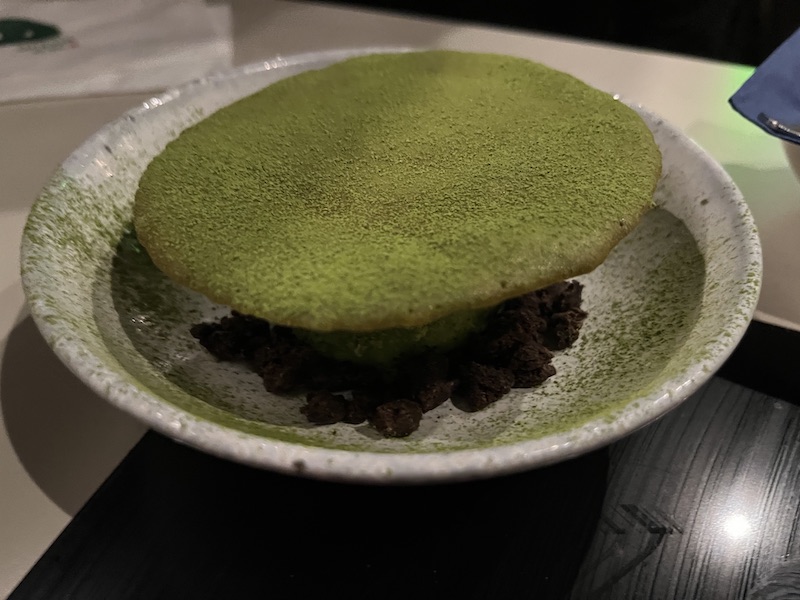
  • Matcha Ice Cream
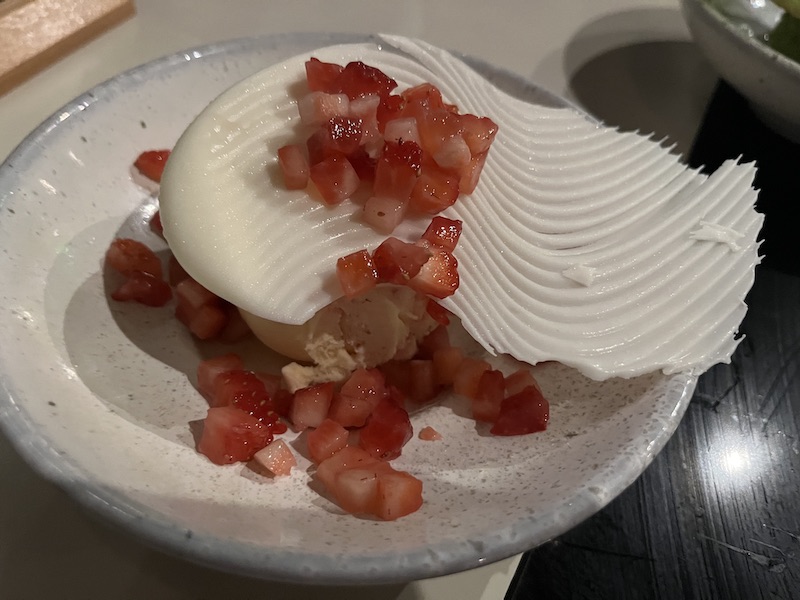
  • Strawberry Ice Cream
  • Pudding with Syrup
博多とんとんの抹茶アイスの画像
Matcha Ice Cream
Strawberry Ice Cream
博多とんとんのデザート
Pudding with Syrup
博多とんとんのスイーツプリン
Pudding with Syrup

These treats offer the perfect end to your meal, and I highly recommend trying them if you have room left!

Lunch Options and Pricing at Hakata Tonton

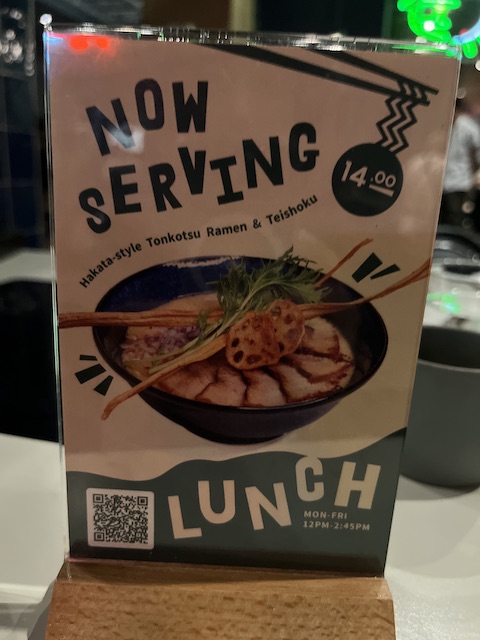
During the pandemic, prices for ramen and other dishes skyrocketed. However, it seems the prices have settled back to a more reasonable range. A bowl of ramen here is priced at about $14, which is closer to pre-pandemic prices. If you’re looking for a quick and affordable lunch in Midtown, this is a great spot to drop by.

Final Thoughts: Why Visit Hakata Tonton?

It’s been 10 years since I first visited Hakata Tonton, and I can honestly say it was even better this time. The Motsunabe with its unique burdock root addition was absolutely delicious. Whether you’re a fan of traditional Japanese hotpots or looking to try something new, Hakata Tonton has something to offer.

If you’re in New York and craving authentic Japanese comfort food, don’t miss out on Hakata Tonton. The atmosphere is warm, the food is top-notch, and the location on 35th Street makes it an ideal spot for a meal with friends or a solo dining experience. Whether it’s a chilly winter day or a cozy evening out, this restaurant will surely leave you satisfied!

I hope this English blog captures the essence of Hakata Tonton and introduces it to English-speaking audiences. Would you like to adjust anything else or focus on a specific part of the experience?

Return to Home

How to Get Global Entry | A Complete Guide for New York Residents

How to Get Global Entry | A Complete Guide for New York Residents

If you live in New York—or anywhere in the U.S.—and have recently become a U.S. citizen or received your green card, the Global Entry program can make your international travel much smoother. In this guide, we’ll explain what Global Entry is, who qualifies, and how you can apply step by step.

Estimated reading time: 3 minutes

What Is the Global Entry Program?

Global Entry is a trusted traveler program managed by U.S. Customs and Border Protection (CBP). It allows pre-approved, low-risk travelers to use automated kiosks at airports and skip long immigration lines when entering the United States.

My husband and I applied for Global Entry, and within a few months we were approved and received our Global Entry ID. Since then, re-entering the U.S. after international travel has been much faster and stress-free.

Eligibility Requirements for Global Entry

To apply for Global Entry, you must meet the following conditions:

  • Be a U.S. citizen or lawful permanent resident (green card holder)
  • Have no criminal record

In addition, citizens from several partner countries can also apply, including:

  • Germany
  • Singapore
  • Mexico
  • Colombia
  • Panama
  • South Korea
  • New Zealand
  • Canada
  • Australia
  • Argentina
  • India
  • Switzerland
  • Taiwan

How to Apply for Global Entry

  1. Submit an application online through the official Global Entry website.
  2. Provide personal details such as employment history, vehicle information, passport details, and criminal history.
  3. Pay the $100 non-refundable fee, valid for 5 years.

The Global Entry Interview

Once your application is conditionally approved, you’ll receive an email notification. You’ll then need to schedule an interview at an enrollment center.

I completed my interview at JFK Airport, Terminal 4. Even if your green card hasn’t arrived yet, bringing proof of your permanent residency application fee receipt is usually sufficient.

Things to Remember After Approval

Once you have Global Entry, keep these points in mind:

  • At check-in, notify the airline that you’re a Global Entry member.
  • Use the TSA PreCheck security lane, which is included with your membership.
  • Global Entry also works for connecting flights from countries like Canada.

Benefits of Global Entr

Here are the main advantages of joining the Global Entry program:

  • Save time at immigration when re-entering the U.S.
  • Skip long security lines with TSA PreCheck access.
  • Less stress and fatigue after long flights.
  • Better chance of making tight connections between international and domestic flights.

Conclusion

For New Yorkers who travel abroad often—especially new green card holders and U.S. citizens—the Global Entry program is a game-changer. By reducing wait times and simplifying security checks, it makes international travel smoother and more enjoyable.

If you’re planning to travel frequently, applying for Global Entry is definitely worth considering!

You wanna visit the Guggenheim Museum

What is the Guggenheim Museum?

It is a modern and contemporary art museum. Its exterior and interior are famously shaped like a snail shell. It was designed in 1943 by Frank Lloyd Wright, a master of American modern architecture.

The museum is located on the east side of Central Park, at the intersection of 88th Street and Fifth Avenue. Two blocks north, you’ll find the Cooper Hewitt Museum.

What’s on Display at the Guggenheim Museum?

The most famous art museum in New York, the Metropolitan Museum of Art, exhibits everything from ancient art to contemporary works. For example, it displays African and Egyptian art from as far back as the BC era, moving through Impressionism and Modern art, and even has a section dedicated to the development of musical instruments. Its scale is so large that one day wouldn’t be enough to explore it all.

In contrast, the Guggenheim Museum focuses on modern and contemporary art. It showcases the political and cultural concepts expressed by artists who are still active today. Through art, it reflects the complexity of current global social issues. The Guggenheim allows you to experience the ever-changing nature of art in real time, and this is one of its defining features.

Difference Between the Guggenheim and MoMA

I haven’t introduced MoMA (the Museum of Modern Art) yet, but the differences between the two are clear. MoMA is for those who love modern design. The Guggenheim, on the other hand, is more about experiencing art in the broader sense, including contemporary concepts.

For example, if you’re someone who enjoys stylish designs, graphic art, and fashion, MoMA would be a great fit. You could also stop by MoMA’s shop to buy trendy kitchen furniture or small souvenirs.

The Guggenheim, however, offers a deeper experience if you can understand the content and concepts behind the art. It makes you think deeply and might even lead to personal insights. So, instead of just looking at the artwork, it encourages contemplation.

Personal Reflection

Even though I’ve lived in New York for 20 years, I only visited the Guggenheim Museum for the first time recently. I wonder why I kept putting it off—maybe it felt intimidating, or perhaps I wasn’t sure if it was a place I belonged. Also, the entrance fee is higher than the Metropolitan Museum of Art.

Perks for New Yorkers

The Metropolitan Museum of Art and the Natural History Museum (which has removed its Native American exhibits; here’s an article from the NY Times) allow New York residents to enter with a donation instead of paying full price. So, I was able to visit for just one or two dollars.

However, the Guggenheim Museum doesn’t allow entry through donations. This is probably because the modern art displayed is by living artists, which makes it a paid exhibition. The general entry fee is $30 (about 4300 yen). While children can visit, I personally think the Guggenheim is not ideal for very young children.

Where is the Guggenheim Museum?

It’s located on Fifth Avenue and 88th Street in the Upper East Side. It might seem far from areas like Times Square, but Manhattan is quite walkable. For instance, I’ve walked all the way from the Upper East Side to the East Village (laughs).

You can take the green subway lines 4 and 5 (Express) or the 6 line (Local) from Grand Central to the 86th Street station. Alternatively, you can take an Uber, Lyft, or yellow taxi, or use CitiBike, although I would not recommend biking for tourists due to safety concerns (there have been incidents with European tourists in the past).

Must-See Highlights at the Guggenheim Museum #1: The Tannhäuser Collection

The Tannhäuser Collection is a collection of paintings gathered by a German art collector and dealer named Tannhäuser. It includes rare works by artists such as Van Gogh, Picasso, Manet, Monet, and Renoir.

One example is Pablo Picasso’s ambitious painting “Moulin de la Galette” (1900), created when he was just 19 years old. This painting is featured in the New York Times article, and I encourage you to read it if you’re interested. I was particularly struck by the woman’s mouth in the painting, which seems to draw attention.

Another highlight is Van Gogh’s “Mountains at Saint-Rémy,” painted during his time in a psychiatric hospital. The details of the sunflowers in the painting make you reflect on why they are depicted in such a manner.

There are many more fascinating works in this collection, along with explanations about the artists’ circumstances at the time. I think it’s important to be able to read English to fully enjoy this aspect.

Must-See Highlights at the Guggenheim Museum #2: Inspiring Visitors

For me, one of the most inspiring things about the museum was seeing the people around me. I think one of the joys of living in New York is experiencing its unique atmosphere. Of course, visiting iconic landmarks like the Statue of Liberty and Times Square is great, but there’s also a unique vibe to New York’s cool and artistic crowd. You’ll often spot stylish, monochromatic-dressed people. You can get a taste of this vibe in the short video below, accompanied by Philip Glass’s piano music.

Must-See Highlights at the Guggenheim Museum #3: The Museum Café

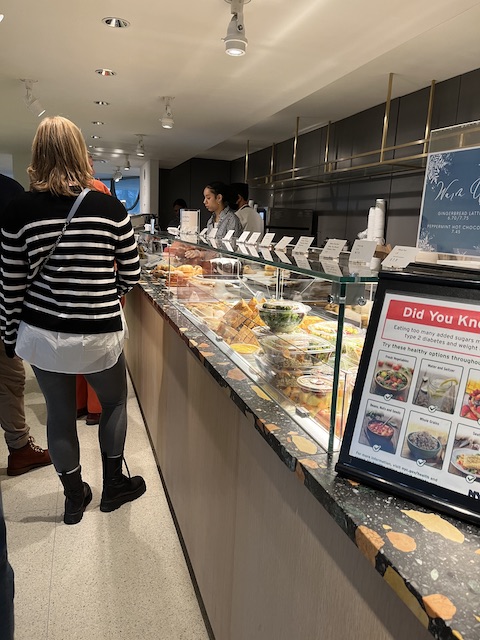
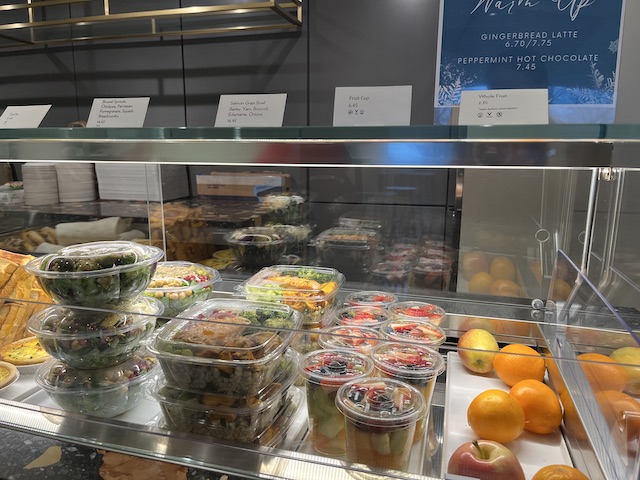
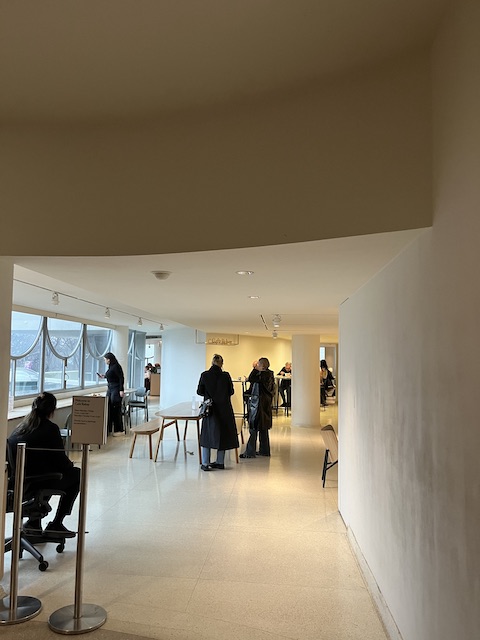
I also visited the café inside the museum, which I highly recommend to New Yorkers as well. It’s the perfect place to get your artistic mindset elevated.

Summary

In this post, I introduced the Guggenheim Museum. I didn’t mention this in the highlights, but the current exhibition theme is “Going Dark.” This exhibition features works by black, Middle Eastern, and indigenous women artists, exploring the theme of visibility. Each piece expresses their experiences in a society where their presence is often barely seen. The conceptual representations are thought-provoking, and some of the works are truly striking. If you’re interested, I highly recommend you visit the museum!

Applying for an American Artist Visa | Beware of Scam-Like Immigration Lawyers

Applying for an American Artist Visa | Beware of Scam-Like Immigration Lawyers

This time, I’m sharing new information about artist visa applications. In New York, I sometimes hear stories about immigration lawyers who behave almost like scammers, so I hope this helps you avoid trouble.

Currently, I am assisting with an SOS case related to an artist visa application. A young Asian woman in her early 20s, who applied for her O-1 artist visa in New York City, ended up hiring a lawyer who turned out to be scam-like. She is now in danger of having her visa denied. I’ve stepped in to support her application in place of that unethical lawyer. We will respond to the RFE (Request for Evidence) by mid-January, and I will share the results later. Based on this experience, I will explain what happened and the key points to watch out for when choosing an immigration lawyer.

What Happened?

The person who contacted me is an Asian pianist who graduated from a well-known university in New York. She applied for her O-1 visa through a famous lawyer. The law firm has a polished, professional website that ranks high on SEO searches.
After submitting her application, she received an RFE (Request for Evidence). The letter said:

You have performed as a guest pianist with your home country’s philharmonic orchestra.
However, this alone is not sufficient evidence of extraordinary ability.
Your current employment situation is unclear.
Please submit additional documentation.

After receiving the RFE, the lawyer abruptly told her:

“There is nothing more we can do.”

This is absurd.

If this is your first artist visa application, you are rarely denied unless you have a criminal record or dangerous ideology. Receiving an RFE usually means simply that more evidence is needed to meet the O-1 requirements.

Note: “Dangerous ideologies” in the U.S. means things like communism or terrorism.

Reviewing the Files She Submitted

Based on her SOS email:

  • She didn’t know how to respond to the RFE
  • She felt something was very wrong with the lawyer
  • The lawyer told her that if she applied again, she would “definitely be denied”

A terrible situation.
So I met with her a few days later and asked her to bring all the documents.

Shocking File Contents & Lawyer Fees

The 200 pages she brought were alarming.

The most serious mistake:

She applied for O-1B, but the cover letter said O-1A.

This is an unbelievable error for an immigration lawyer.

The filing itself was sloppy, filled with unnecessary documents. The lawyer had simply printed dozens of pages from her university’s website and submitted them as-is.

Paralegals working at law firms typically prepare these documents, so the work may have been done carelessly. Regardless, it is extremely unprofessional.

And the fee? USD $5,000

(About ¥800,000)

We don’t know the exact contract terms, but she cannot get a refund.
And since lawyers know the law, suing them would be extremely difficult.

When I checked the firm’s Google reviews, there were many positive and negative ratings—about half and half. For negative reviews, the lawyer (presumably the owner) aggressively argued back in the comments. A huge red flag.

It appears this lawyer chooses clients who look like easy targets.

Why I’m Convinced This Was a Scam

This lawyer likely didn’t care whether she could actually get the visa.
As mentioned earlier, first-time O-1 applications are rarely denied. Immigration lawyers also want to avoid denials on their record.

This lawyer may have:

  • Accepted any client
  • Submitted minimal documents on purpose
  • Expected an RFE
  • Then abandoned the client, earning money with no responsibility

A predatory pattern.

The Lawyer’s Possible Thought Process

“Submit a handful of university documents, hope it gets approved.
If it gets denied, oh well — sorry.”

The lawyer didn’t send any of her truly important documents to USCIS.

I have the firm’s information, but I cannot reveal it publicly due to legal risks.
Instead, please read the following points carefully.

Tips for Choosing an Immigration Lawyer

The most important section.

What exactly is an immigration lawyer?

This does not apply to all immigration lawyers, but it’s good to know:

A former Ivy League student of a high-level corporate lawyer once told me:

  • Immigration law is considered one of the lower-ranked fields among lawyers
  • Many lawyers want to work in business law or criminal law, but those fields are highly competitive
  • Those who cannot enter those fields often end up in immigration law

(Again, not all immigration lawyers fall into this category.)

As a result, some immigration lawyers come from lower-tier schools with fewer resources and may not have trained properly in legal documentation. This leads to sloppy submissions.

Why You Should NOT Find a Lawyer Online

This pianist found her lawyer through online searches.
The reviews looked mostly positive, and the firm appeared “prestigious,” but she didn’t notice the many negative reviews.

Always choose a lawyer recommended by trusted friends who successfully obtained their visas.

The lawyer I personally recommend is Sindell Law Firm, but note:

  • Good lawyers charge consultation fees (~$300)
  • Good lawyers will clearly say “No” if your materials aren’t strong enough

You Have the Right to Review the Final Documents

Before USCIS submission, ask:

“Can I review the final application packet before you send it?”

If not, the lawyer may submit incomplete or irrelevant materials—like in this case.

Important Documents Missing From Her File

The file lacked a Written Consultation, which is essential.
She submitted 20 recommendation letters, but unfortunately:

  • Recommendation letters alone don’t carry strong weight
  • The more famous the recommender, the more USCIS questions your actual ability
  • Highlighting others’ fame can backfire

Summary

This article covered the dangers of fraudulent immigration lawyers when applying for an artist visa. Her application results will likely come around March. → Result

NYC Subway My Terrifying Experience: What Happened and How to Stay Safe

NYC Subway My Terrifying Experience: What Happened and How to Stay Safe


New York City is known for its energy, diversity, and fast-paced lifestyle—but it can also surprise you with occasional moments of danger. Although NYC has become safer in recent years, unpredictable encounters can still happen, especially on the subway. Today, I’m sharing a real-life experience that shook me to the core, along with practical safety tips every commuter should know.

A Quiet Afternoon Ride Turned Into Chao

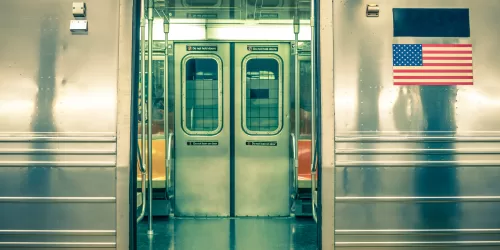
On what seemed like an ordinary weekday, I boarded a local Manhattan subway with only a handful of passengers in the car. As the doors were closing, a visibly unstable man rushed toward the train and became trapped between the doors.


Moments later, he entered the car and exploded into a violent outburst—shouting profanities, kicking the doors, and pacing aggressively only inches away from me.

This terrifying moment reminded me how unpredictable public transportation can be, even in a safer New York.

Why NYC Subways Still Face Safety Challenges

While overall safety has improved—with more police presence and cleaner stations—major issues remain:

  • Fare evasion brings unmonitored individuals into the system
  • Mentally unstable individuals often use the subway as shelter
  • Overcrowding and understaffing lead to unpredictable environments

These factors create conditions where sudden incidents can occur without warning.

What To Do If You Encounter an Aggressive Person on the Subway

From this experience, here are key survival tactics:

1. Don’t Make Eye Contact

Aggressive individuals may interpret it as a challenge.

2. Stay Calm and Don’t React Emotionally

Neutral body language reduces the chance of escalation.

3. Don’t Look Down Completely

You need to maintain awareness of their movements.

4. Have an Exit Plan

Know where the nearest doors are and move at the next stop if possible.

5. Wear Shoes You Can Move In

Sneakers give you better stability and mobility.

These small decisions can significantly improve your safety during unpredictable moments.

What NYC Riders Should Expect Going Into Winter

Shorter days and darker evenings can make subway travel feel more intimidating. Consider alternatives when necessary:

  • Choose buses or taxis during late hours
  • Travel with friends when possible
  • Avoid crowded or isolated areas of the platform
  • Stay aware and avoid distractions like loud headphones

Manhattan’s population continues to grow, meaning more people—and potentially more unpredictable encounters.

Final Thoughts

Despite this frightening moment, NYC remains a vibrant and exciting place to live. The key is staying aware, confident, and prepared. With the right safety mindset, you can enjoy the city while protecting yourself from unexpected situations.

Stay safe—and stay strong—because New York always keeps you on your toes.

Lucky Cat Izakaya New York: A Cozy Dining Experience

Lucky Cat Izakaya New York: A Cozy Dining Experience

lucky cat restaurant

Estimated reading time: 1 minute

If you’re craving authentic Japanese izakaya food in the heart of New York, Lucky Cat Izakaya is a must-visit. It’s been a while since I last visited a Japanese izakaya in New York, as I’ve been cooking at home more due to the pandemic and rising costs. However, I decided to take my American friend out for dinner, and she recommended this place where she sometimes dines alone. Here’s my review of Lucky Cat Izakaya in Midtown.

Lucky Cat website

What is Lucky Cat Izakaya?

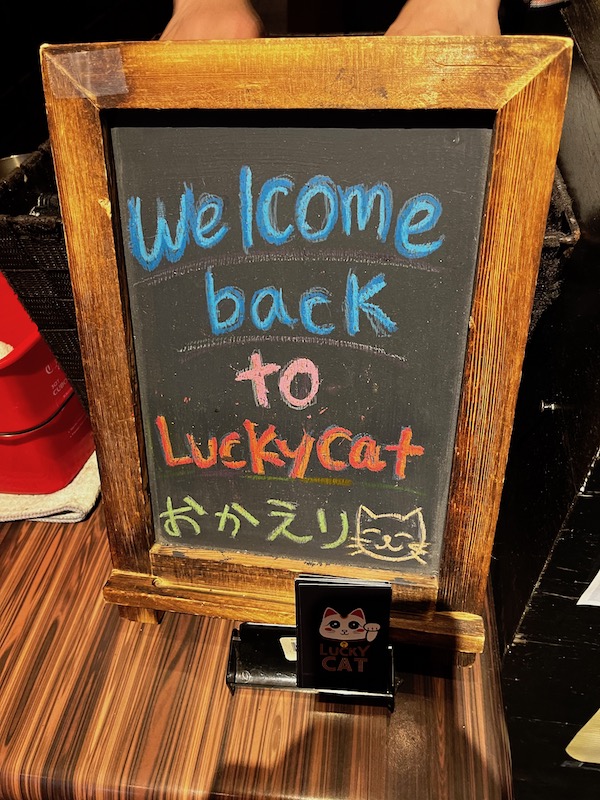
ラッキーキャットの看板

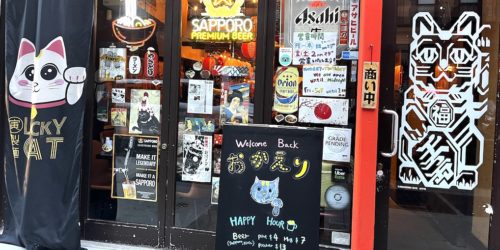
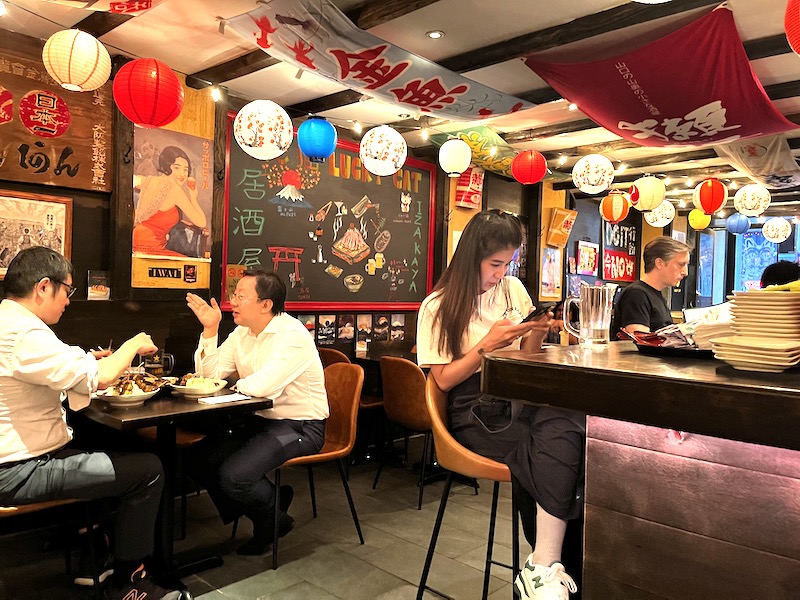
Lucky Cat Izakaya is run by a Japanese owner and offers a cozy yet lively atmosphere. Upon entering, you’re greeted by a sign that says “おかえり” (Welcome home) in Japanese, which immediately gives a warm, familiar vibe – something that only a fellow Japanese can truly appreciate.

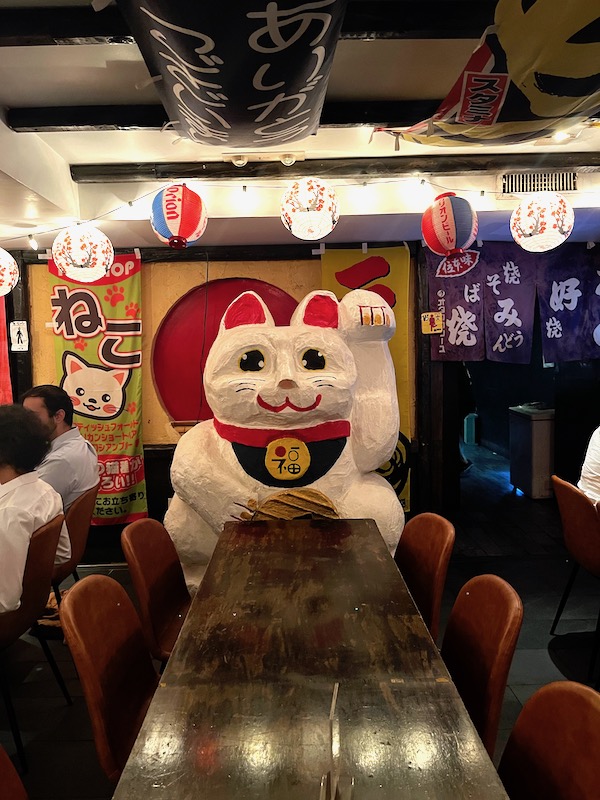
I arrived as the restaurant opened, and it quickly filled up. The interior is filled with retro Showa-era artwork and text, giving it an old-school Japanese feel, but with a slightly Asian twist. The lanterns and decor seem to capture a broader Asian influence, which gives the izakaya a unique character.

Lucky Cat also has a bar counter, making it a perfect spot for solo diners to enjoy a drink and meal at their own pace. Once inside, I was welcomed by the giant maneki-neko (lucky cat) statue in the back. It’s clear this izakaya loves cats, and as a cat lover, I felt right at home!

Lucky Cat’s Menu – Must-Try Dishes

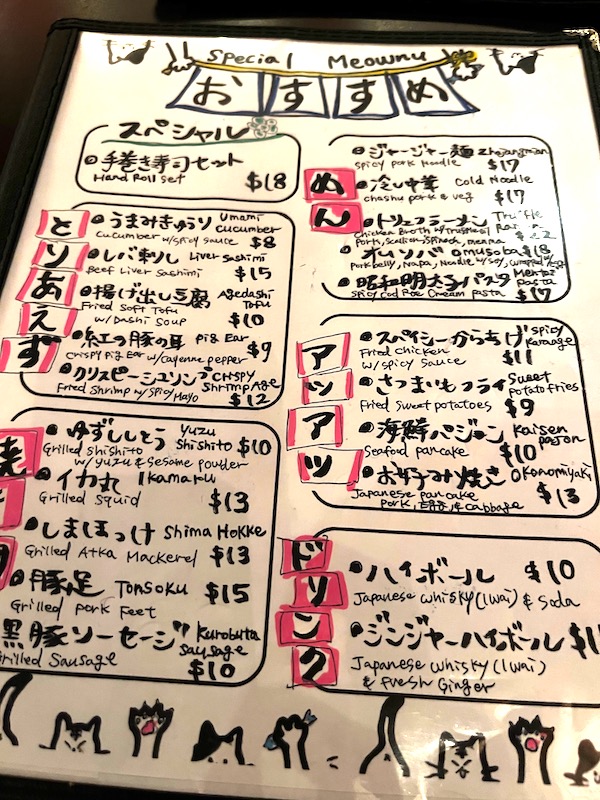
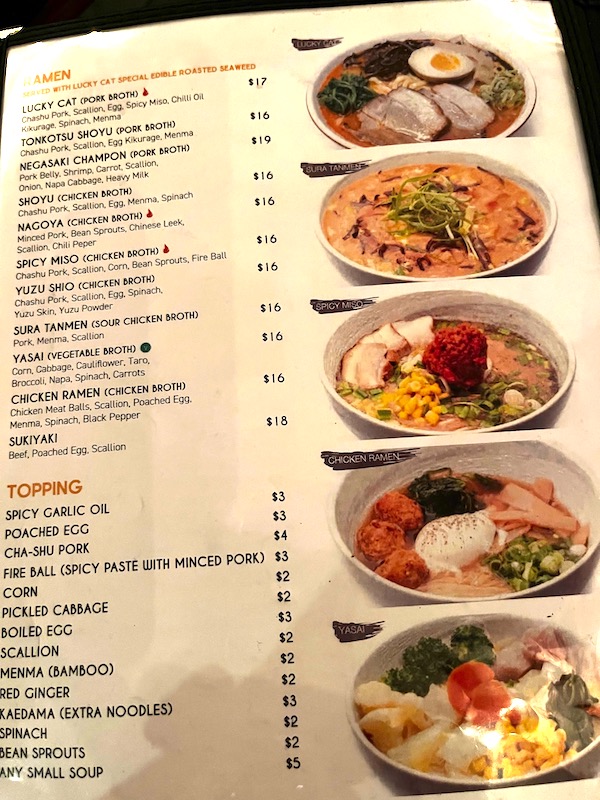
Due to the rising costs in New York, the prices here have gone up slightly, but it still feels like they are keeping things reasonably priced. Here are some of the standout dishes from their menu:

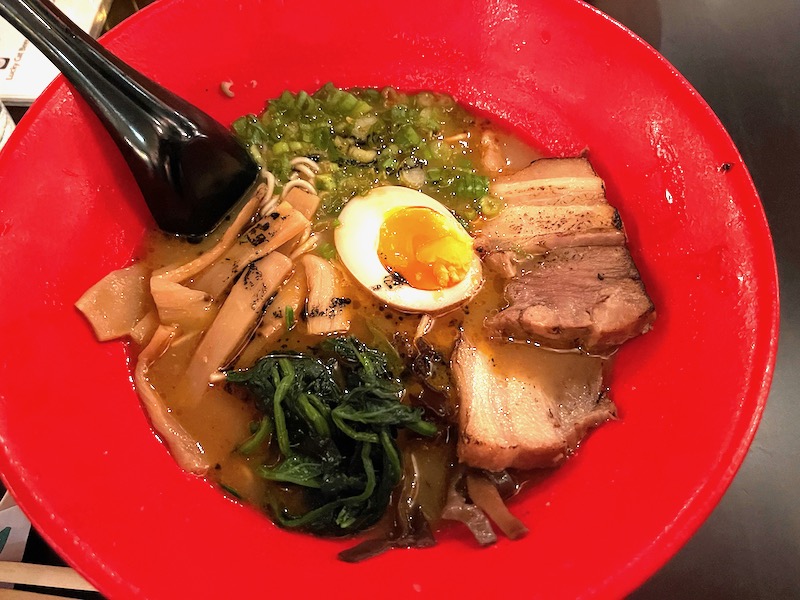
  • Lucky Cat Ramen (Pork Bone Flavor): Rich, flavorful broth with tender chashu (braised pork).
  • Spicy Fried Chicken: Bold flavors and crispy perfection—ideal for pairing with drinks.
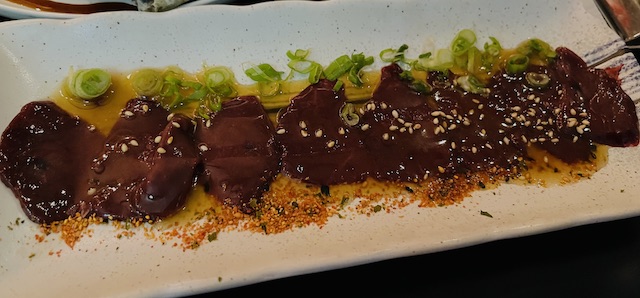
  • Liver Sashimi: Yes, they serve liver sashimi, which is rare to find in the U.S. and absolutely delicious.
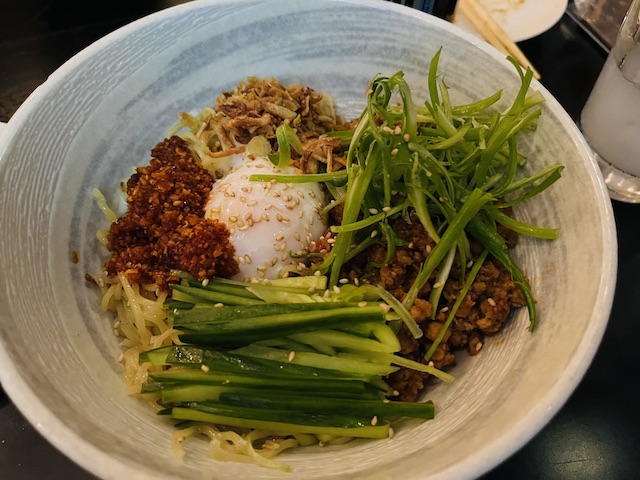
  • Jajangmyeon (Fried Noodles): A savory, comforting dish with a robust sauce.
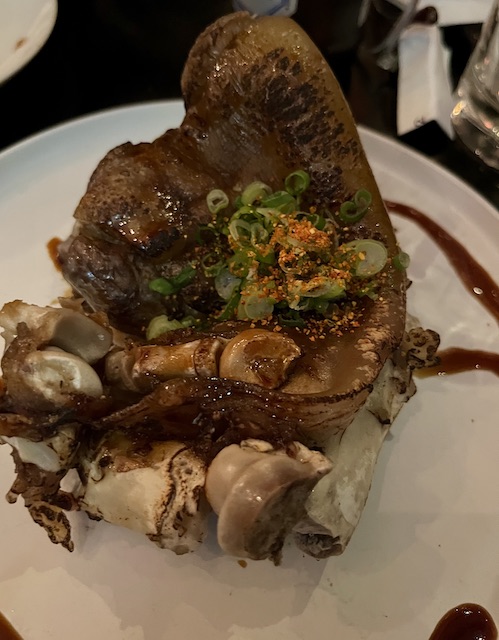
  • Pig’s Trotters: A unique dish for those who enjoy adventurous eating.

One of the highlights was the liver sashimi, which my friend absolutely loves. It was a bit intimidating at first, but it turned out to be quite tasty. It’s a surprise to find liver sashimi in the U.S., but Lucky Cat brings that special Japanese izakaya experience to NYC.

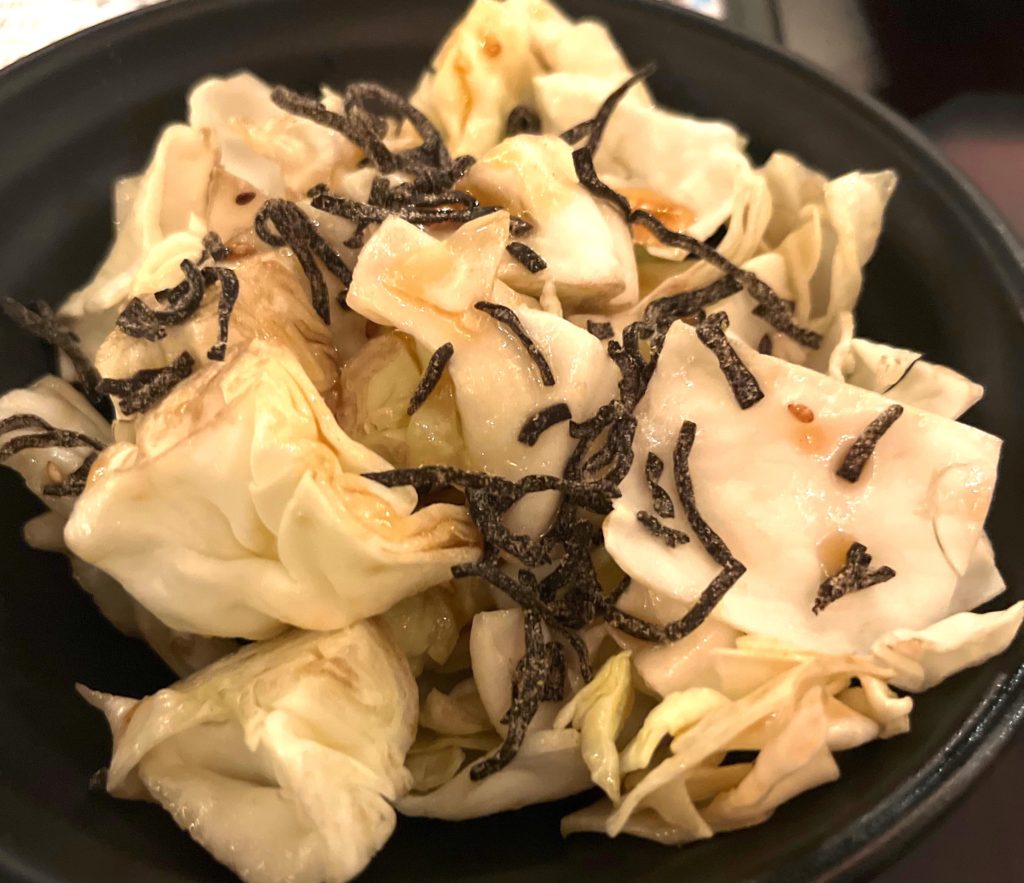
Cabbage Salad with Sesame oil
Spicy Fried Chick
Lucky Cat Ramen
Jajangmyeon (Fried Noodles)
Pig’s Trotters
Liver Sashimi

Location: Where to Find Lucky Cat Izakaya

ニューヨーク居酒屋ラッキーキャットの店内の様子

Lucky Cat Izakaya is located on 53rd Street in Midtown, just a short walk from other popular spots like Gyukaku Midtown. You can easily reach it by subway with the Green 6 line, Orange M line, or Blue E line.

Fun Payment Experience & Apple Card Cashback

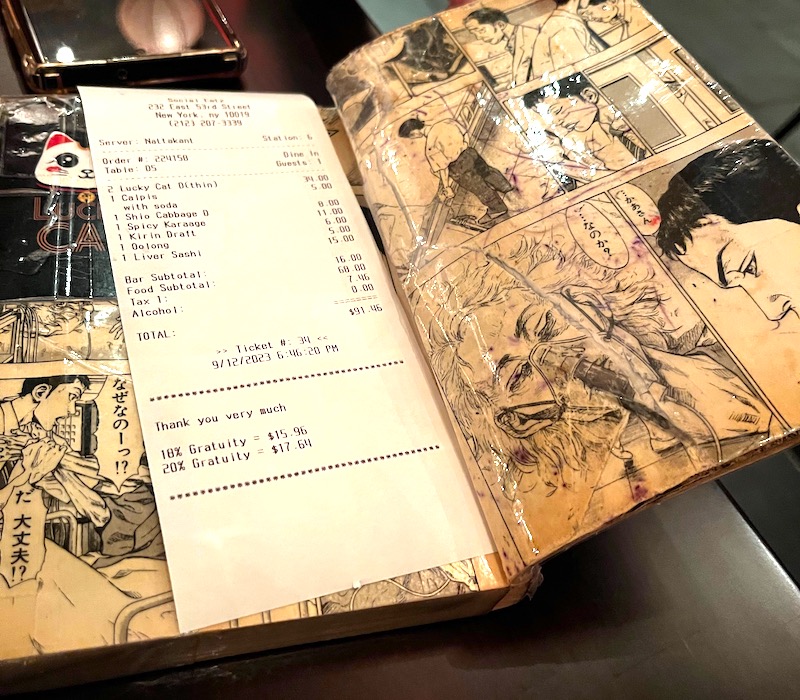
What made the payment experience memorable was that I used my Apple Card, which offers a 5% cashback on dining. Our bill came to around $91, and after a 20% tip, I received a nice little cashback from my Apple savings account. If you’re a frequent diner, using an Apple Card can be a great way to earn rewards while enjoying your meal! ( It was promotinal period – no longer. Currently 2 %)

Final Thoughts: Why Lucky Cat Izakaya is Perfect for Cat Lovers and Japanese Food Enthusiasts

This izakaya stands out for its unique Japanese dishes you can’t find anywhere else, along with its cat-themed decor that makes it especially enjoyable for cat lovers like me. While the ramen wasn’t my personal favorite, the jajangmyeon was a pleasant surprise! If you’re looking for a spot to enjoy a casual, cozy meal with a friend or just want to explore the quirky charm of Midtown’s Lucky Cat Izakaya, I highly recommend giving it a try!

How to Prepare Beets Easily with an Instant Pot — A Simple Japanese Home Recipe

how to cook beets in an Instant Pot Japanese recipe — A Simple Japanese Home Recipe

Hello everyone! I’m Maegami from the blog Megami no Maegami (Goddess’s Bangs).
Today’s post is from my Home Cooking Series, and we’re talking about a colorful superfood — beets!

Estimated reading time: 5 minutes

You might know beets from the famous Russian soup borscht, but in New York, they often show up in salads. Personally, I used to dislike beets — they tasted earthy, overly sweet, and cold, which didn’t appeal to me. I also assumed they wouldn’t go well with Japanese dishes.

However, after learning that beets are a powerful superfood packed with nutrients, I decided to give them another try — this time, cooking them my way.

Why Use an Instant Pot for Beets?

The method I’ll share today uses the Instant Pot, making beet preparation easy, fast, and delicious.
Once cooked, you can use these beets in any dish — salads, side dishes, or even Japanese-style meals.

If you don’t already own an Instant Pot, it’s one of the best investments for busy home cooks! You can cook rice, beans, soups, and even make Japanese dishes like natto, nimono, and chawanmushi.

Here are a few items I personally use and recommend:

  • Instant Pot Duo 6-Quart 7-in-1 Electric Pressure Cooker
    👉 Check price on Amazon (affiliate link)
  • Instant Pot Stainless Steel Trivet (if yours didn’t come with one)
    👉 See it on Amazon (affiliate link)
  • Organic Beetroot Powder (for smoothies or natural coloring)
    👉 View on Amazon (affiliate link)

💡 As an Amazon Associate, I earn from qualifying purchases. Your support helps keep this blog running — thank you!
[word_balloon id=”1″ size=”M” position=”L” radius=”true” name=”” balloon=”talk” balloon_shadow=”true”]

I’ve finally overcome my fear of beets!
[/word_balloon]

What You’ll Need

  • 3 large beets (or 4–5 small ones — try to choose similar sizes for even cooking)
  • 1 cup of water (about 200ml)
  • Instant Pot + trivet (comes with the pot)

Beets often come with their leaves attached — don’t throw them away!
They’re full of nutrients, and later I’ll show you how to cook them too.

Trim the leaves, leaving about 2 cm of the stems on the beet roots. Keep the leaves aside for later.

Quick and Easy Beet Prep (No Peeling Needed!)

Many recipes tell you to peel and dice beets before cooking — but that takes time and limits how you can use them later.
My version cooks them whole with the skins on, saving time and effort.

You can store the cooked beets in the fridge with the skin on, then peel and slice when needed — the skin slips off easily.

Step-by-Step Instructions

  1. Wash the beets thoroughly. Farmers’ market beets can be quite muddy. Don’t forget to wash the leaves too.
  2. Pour 1 cup of water into the Instant Pot.
  3. Place the trivet inside the pot.
  4. Arrange the beets evenly on the trivet (cut large ones in half if needed).
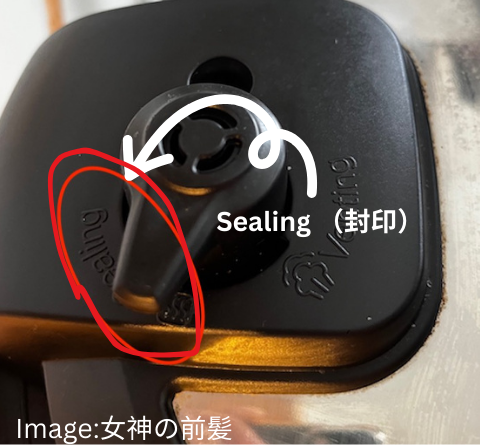
  5. Seal the lid and set the valve to “Sealing.”
  6. Select “Pressure Cook” → “High Pressure” → 20 minutes.
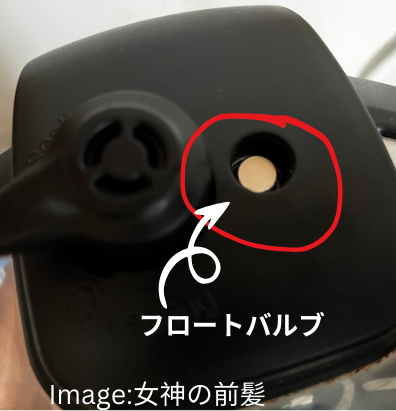
  7. Let the pressure release naturally (wait for the float valve to drop).
  8. Remove the beets and peel the skins — they should slip off easily.
  9. Slice or dice as you like!
インスタントポット の写真
インスタントポット のフロートバルブの写真

Now your beets are ready to use in any recipe — cube them for salads, or slice them thinly for Japanese-style side dishes.

Cooking with Beets and Beet Leaves

Once you’ve prepped the beets, the fun begins!

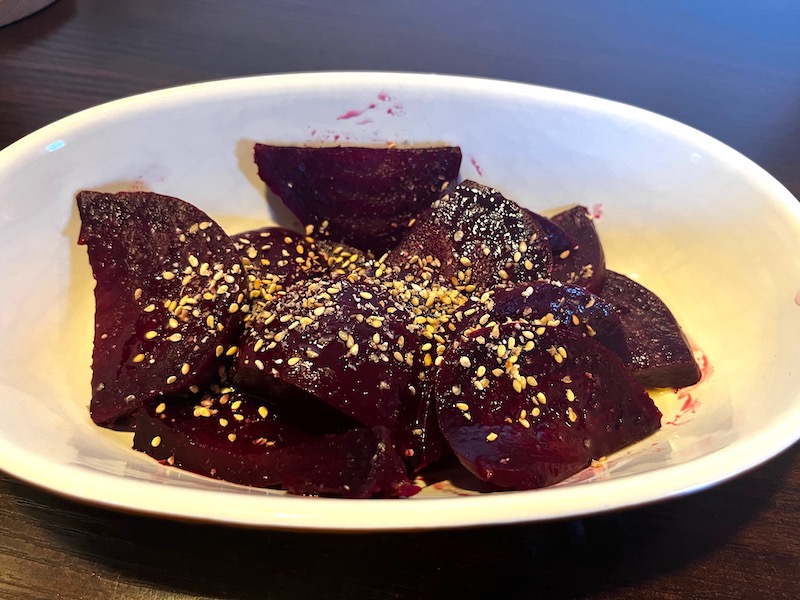
  • For salads: Slice beets, drizzle with sesame oil and salt, then sprinkle sesame seeds on top. The sesame oil removes the earthy smell and pairs beautifully with rice.
  • For the leaves: Stir-fry with garlic, soy sauce, mirin, and a little avocado oil. It tastes similar to spinach but with a nice crunch from the stems.
ビーツをごま油と塩で和えたお料理の写真
ビーツとニンニクのキンピラの写真

If you’re not a garlic fan, skip it — or add a pinch of shichimi (Japanese chili mix) for extra flavor.

Final Thoughts

That’s it! This is my quick and easy method for preparing beets using an Instant Pot.
The result? Soft, sweet beets that melt in your mouth — nothing like the earthy, cold ones you find in store-bought salads.

Beets are great for your health, but don’t overdo it! Eating too many can turn your urine or stool reddish — that’s just the pigment, not a health issue. But if it happens without eating beets, see a doctor.

I hope this inspires you to try cooking beets at home.
If you enjoyed this post, check out my homemade natto recipe using the Instant Pot — it’s another fun and healthy Japanese dish!

ビーツを蒸した写真
Before cooking
ビーツを調理した後の写真
After cooked

Is New York Safe to Visit Now in 2023 for Japanese Travelers?

Is New York Safe to Visit Now in 2023 for Japanese Travelers?

The Pandemic’s Impact on New York City

The pandemic that began in 2020 turned New York City into a ghost town. Streets once full of people became silent, and crime rates rose sharply.
In 2021, the rise of Asian Hate crimes shocked the world. Many believed people who had shifted to remote work would never return to the city.

It’s true — working from home became common. Yet, surprisingly, Manhattan has once again filled with people. The energy of the city is back! In this article, we’ll explore the current safety and subway conditions in New York City as of September 2023 — my final safety report since the pandemic began.

New York Has Always Been a Dangerous City

New York has never been known as a perfectly safe place — it’s always had an edge.
When I lived in the Lower East Side in the early 2000s, however, the city transformed. Streets grew lively, neighborhoods improved, and safety increased dramatically.

This was largely thanks to city leadership at the time. Those struggling with mental health issues were moved to shelters, and criminals were sent to prison. You could enjoy a night out, ride the subway, or take a taxi home late at night without much worry.

But during the pandemic, prison and shelter systems became overwhelmed, and many people were released. Unfortunately, this led to a temporary decline in safety.

New York in 2023: Almost Back to Normal

Today, New York feels almost back to its pre-pandemic rhythm.
While occasional reports of Asian Hate still surface, the city overall feels much safer than in 2021–2022. You’ll still see some homeless individuals or people struggling mentally, but subway ridership has surged again — which naturally increases safety.

Police presence is strong across stations and streets, and visitors can feel a greater sense of security. In short, New York has regained much of its old energy.

Staying Safe in New York at Night

Some things never change — especially nighttime safety tips.
Always be aware of your surroundings when walking, and avoid deserted streets. When returning home late, it’s best to use Uber, Lyft, or a yellow cab instead of walking or taking the subway alone.

Remember: “Safe” in New York doesn’t mean risk-free. It means knowing how to move smartly.

Final Thoughts

This is my final update on New York’s safety since the pandemic. Many readers have shown strong interest in this topic, so I wanted to share one last look.

New York is never perfectly safe — and that’s part of its wild charm. Stay alert, but don’t be afraid to enjoy it. The city is alive again, and you can finally experience the vibrant, pre-pandemic New York once more.

Lost Items on the Shinkansen- visita Iida Bashi[飯田橋駅]

Lost Items on the Shinkansen

I left my e-book on the Shinkansen during my travels in Japan this summer while using the Japan Rail Pass. After a wonderful trip, I was carrying a lot of souvenirs, which made my hands full, and I must have forgotten the e-book on the train. I suspect that when I tried to put it into my bag, it slipped and fell out. I remember placing it into my bag, so I assumed it had fallen somewhere under the seat of the Shinkansen, which I remembered being in the 1st car. With that memory, I figured there was a good chance I could find it. Here’s how the e-book made its way back to me.

Registering Through the Chat

First, I visited the lost item notification page. Once there, I started a chat with the Shiba Inu mascot.

However, I found out that I couldn’t use the lost item chat from the U.S. (since I was overseas), so I had to explain the process in text instead. Here’s how the process works:

Lost Item Chat Description

The Shiba Inu mascot will ask you a few questions. First, you’ll need to provide the location and date you lost the item. Since I remembered the exact spot where I lost it, I gave the train type, date, and seat number, along with detailed descriptions of the item, including the color. You can select from available options, but I recommend writing the specific color in the input field. Even if the category doesn’t match exactly, it’s not a problem, as there’s a section for you to explain in your own words.

After Completing the Chat Registration

Once you’ve completed the chat, you’ll receive a registration number via email. It may take a few days for them to search for your lost item, as they are careful, especially if it’s a high-value item, to ensure they match it correctly.

JR Tokyo Station Lost & Found Center

If your lost item is found, you will be notified that something similar to your description has been located. The item will be moved to the Lost & Found Center at Tokyo Station. However, the items are only kept for a limited period, so if you are traveling outside Tokyo, you may not be able to pick it up right away. In my case, I couldn’t make it to Tokyo Station in time before the storage period expired.

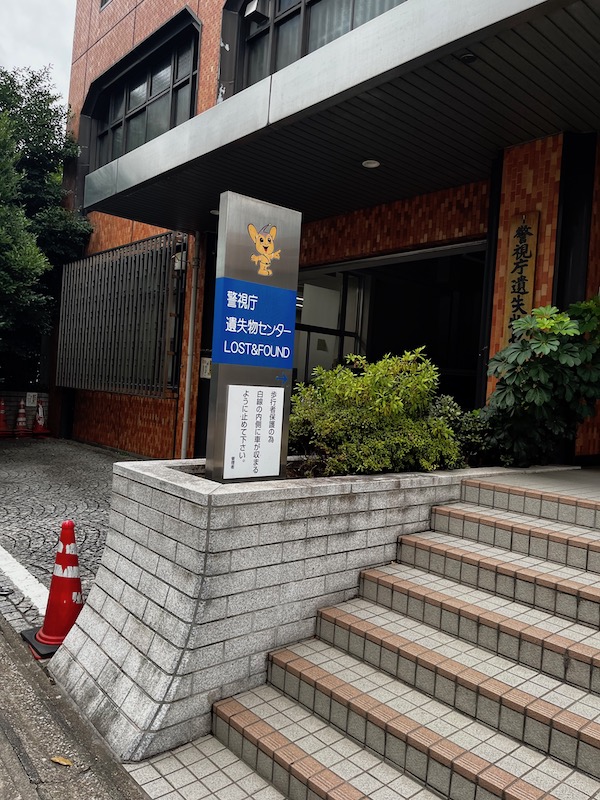
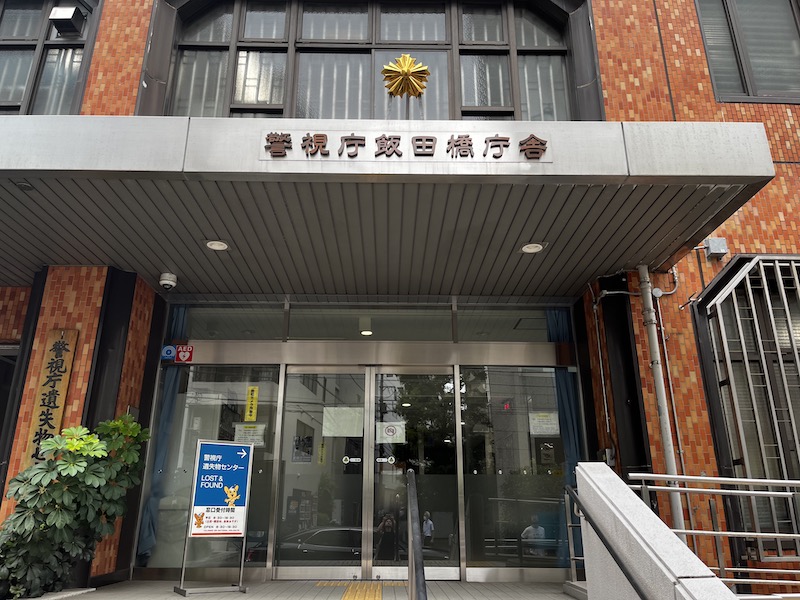
Visiting the Lost & Found Center at Iidabashi

When the holding period at Tokyo Station expires, the lost items are transferred to the Iidabashi Police Station’s Lost & Found Center. It’s quite easy to get there: I took the JR Yamanote Line and got off at Iidabashi Station. There are large signs directing you to the Lost & Found Center.

What to Do if You Forget Your ID

Since I live overseas, my passport serves as my ID. Unfortunately, I forgot to bring it with me. However, I was able to use my credit cards as ID. The key is to describe the lost item as specifically as possible. In my case, it was an English-language e-book, which made it easier to identify since there weren’t many similar examples. For items like wallets or valuables, it’s best to bring your ID and be prepared to explain the contents and condition of the lost item.

Summary

In this article, I explained the steps for dealing with lost items on the Shinkansen. If you can’t pick up your item at Tokyo Station, you can go to the Iidabashi Lost & Found Center. Don’t give up if you lose something—head to Iidabashi to pick it up!

飯田橋遺失物センターの入り口の写真